
Styling tags in WordPress using inline CSS tricks
If you’ve built even the simplest WordPress website, You’ve probably come across a scenario where you or your client would like to alter the appearance of elements on the site. Styling is done using CSS code (Cascading Style Sheet). When the website visitor’s browser reads a style sheet, it formats the post according to the information in the style sheet.
Depending on what you’re changing, there are a number of ways to accomplish this. In most cases you’d be working with a child theme and that will allow you to update the child theme’s CSS file with the new or modified CSS code.
But what if you want to apply some localized styling on a particular post. Well, that’s when you can use the ‘Inline Styling’ technique.
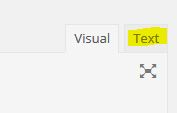
Setting the correct editor mode
To make use of this functionality, you will need to switch the TinyMCE editor into ‘Text’ mode when editing the tag – you can switch back to visual once you’re done editing.
Styling titles with inline CSS
An inline style can be used to apply a unique style for a single tag, it gives up many of the advantages of a style sheet, but is useful for occasional minor adjustments.
[css]
<h1 style="color: gray; font-size: 50px;">Big titles welcome</h1>
[/css]Big titles welcome
In the example above, we’re telling the user’s browser to style the contents of the H1 tag with color ‘gray’ and font-size of ’50px’. This will override whatever the current CSS settings are for those particular parameters for the H1 tag. This is useful for adding a super large font in just one place and on a specific post.
[css]
<h1 style="font-family: Tahoma; color: gray; font-size: 50px;">Big titles welcome</h1>
[/css]Big titles welcome
In the 2nd example, we’re overriding the themes default ‘H1’ font setting and instructing the user’s browser to display the title using the Tahoma font-family.
[css]
<h1 class="widgettitle"; style="color: gray; font-size: 50px;">Big titles welcome</h1>
[/css]Big titles welcome
In the 3rd example, we’re using an existing ‘class’ that’s already defied in the child theme’s CSS to style the title.
Styling a list
Another common change might be using a different list style in a given section of a post.
[css]
This list uses square dots
<ul style="list-style-type: square; margin-left: 15px;">
<li>Item one</li>
<li>Item two</li>
<li>Item three</li>
</ul>
[/css]This list uses square dots
- Item one
- Item two
- Item three
Rounding out
When you insert an image into your post, it will inherit any styling from the theme. Most often, themes don’t impose any styling on inserted media, so you’re left having to manipulate with an image editor, this is a tedious and time consuming job. A little CSS styling will take care of it for you.
[css]<img style="border-radius: 30px; box-shadow: 4px 4px 9px -4px rgba(0,0,0,0.75);" src="https://e2marketing.cc/wp-content/uploads/2012/05/Steve@E2Mktgdotcom.jpg" alt="SteveEarle-1" width="299" height="299" />[/css]

In this example we’re applying a CSS mask and a small box-shadow to an image in our post to give it a nice rounded-corner look without having to manage the process in an image editor like PhotoShop.
These are just a few simple things you can do with inline CSS. But remember, use it sparingly.
If you’ve enjoyed this article, please share it with your friends and colleagues – Thank you!